
Product photography plays an integral role in the sphere of ecommerce and online store success. High-resolution imagery is particularly crucial when presenting larger products on your online platform. Large product photography can be a bit challenging considering the size and sometimes the complex nature of the products. Nonetheless, with the right setup and technical know-how, capturing stunning images of larger products is achievable.
This blog aims to help you navigate the inside outs of large product photography. It focuses on tips for setting up your studio, capturing high-quality images, editing them effectively, countering common challenges and optimizing your professional photographic journey. Let’s explore together how you can elevate your large product photography prowess and, subsequently, boost the success of your ecommerce store.
Why Should You Invest in High-Quality Large Product Photography?
In the era of digital shopping, high-quality large product photography forms an essential part of any successful ecommerce platform. Clear and detailed images provide a vivid product representation, helping customers understand the product better before purchasing. Moreover, quality images enhance the overall shopping experience, solidifying trust and loyalty towards the brand. So, let’s dig deeper into the importance of quality product photography.
Enhancing Customer Experience
Customers perceive the quality of products based on the quality of their images. In large product photography, every detail matters, from the fabric texture in a piece of furniture to the sleek surface of an appliance. High-quality images create a sense of transparency, providing customers with a virtual in-store experience.
By providing a comprehensive visual catalog that captures the minute details of your large products, you’re not just displaying products. You’re enhancing the overall customer experience. This increased trust leads to better engagement, more positive reviews, and heightened customer satisfaction.
Strengthening Brand Identity
A picture is worth a thousand words, but a high-resolution image of a large product speaks volumes about your brand’s commitment to quality and customer satisfaction. It demonstrates a professional approach and a keen eye for detail, vital aspects that resonate with discerning customers looking for superior, reliable products.
When done right, large product photography effectively communicates your brand’s essence – its style, quality, and ethos. By consistently offering high-quality imagery, you create a unique visual language that becomes synonymous with your brand, helping you carve a distinct identity in a sea of competitors.
Read: Unlocking 9 Latest Fashion Photography Trends in 2024
Increasing Conversion Rates
An integral aspect of ecommerce success is turning viewers into buyers, and this is where high-quality large product photography shines. As visually driven beings, customers naturally gravitate towards images that fire their imagination and stir their emotions – pictures that effectively showcase the quality of a product in an aesthetically appealing manner.
Powerful large product photography attracts and retains customer attention, favoring their purchasing decisions. When customers visualize how a product fits into their lives, they are more likely to hit the ‘Buy Now’ button, thus skyrocketing conversion rates.
Also, read our blog on 9 Different Types of Fashion Photography
How to Set Up the Studio Space for Large Product Photography?
Setting up your studio for large product photography may seem daunting, given the size of the products involved. But it needn’t be so. With careful planning and thoughtful use of space and photography equipment, you can create a functional and productive product photography studio setup suitable for large product shoots. This involves investing in suitable backdrops, lighting equipment, camera setups, props, accessories, and post-production tools. Let’s walk through these aspects one by one.
1. Backdrop
Choosing the right backdrop is essential in large product photography as it sets the tone for the image and can significantly impact the product’s visual appeal. The ideal backdrop should be:
- High Contrast: A high-contrast backdrop makes your product pop out. If your product is light, choose a dark backdrop and vice versa.
- Neutral: Opting for a neutral, gray or white backdrop usually works best, as it doesn’t distract from the product and makes the product colors more accurate.
- Consistent: Ensure consistency across all your product images by using identical backdrops. This gives a more professional look and enhances the viewer’s shopping experience.
- Easy-to-edit: An easy-to-edit backdrop saves post-production time. A solid color backdrop, preferably white, is recommended.
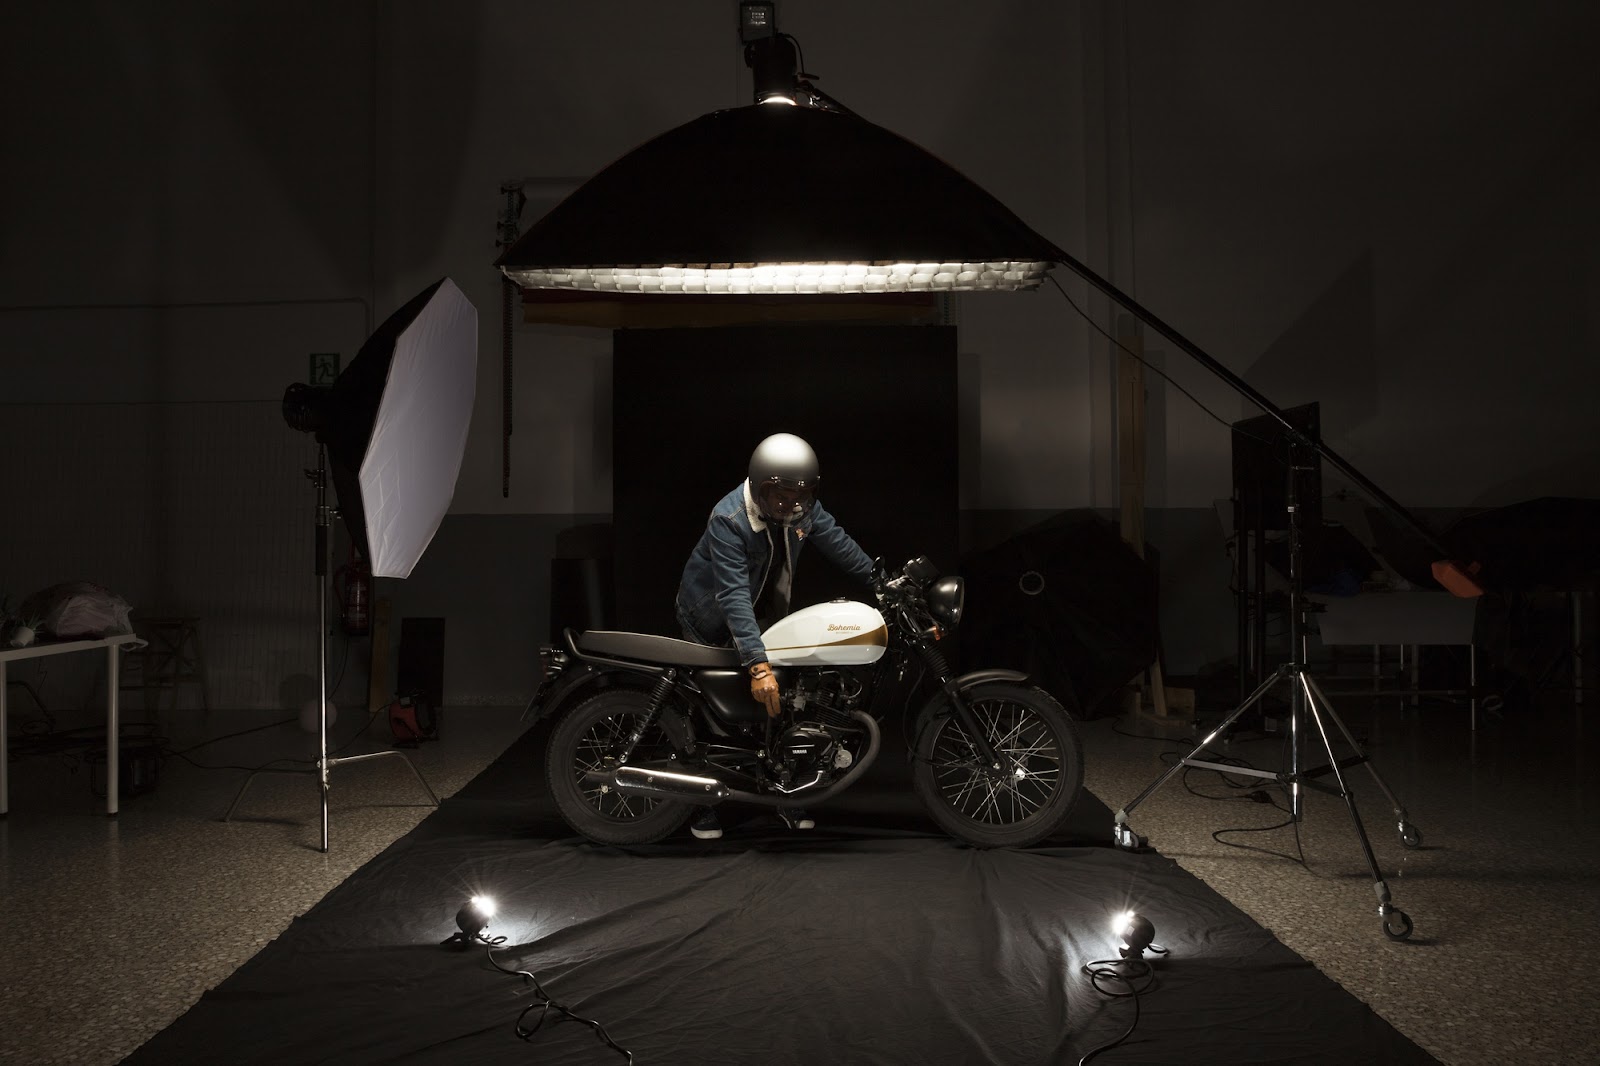
2. Lighting Equipment
Lighting is the most critical aspect of any photography, and large product photography isn’t an exception. The key is to create a well-lit environment to capture your product accurately and professionally. Your essential lighting gear should consist of:
|
Lighting Equipment |
Usage |
|
High-Intensity Strobe Lights |
Creates a bright, concentrated light for a detailed and sharp image. |
|
Softbox |
Softens and diffuses light, reducing harsh shadows. |
|
Umbrella |
Spreads light across a broad area, suitable for capturing larger products. |
|
Reflectors |
Bounces stray light back onto the product, illuminating hard-to-reach areas. |
Remember, the goal is to emphasize the product’s best features and minimize unflattering shadows and glare. Investing in quality lighting equipment can significantly elevate the final image quality.
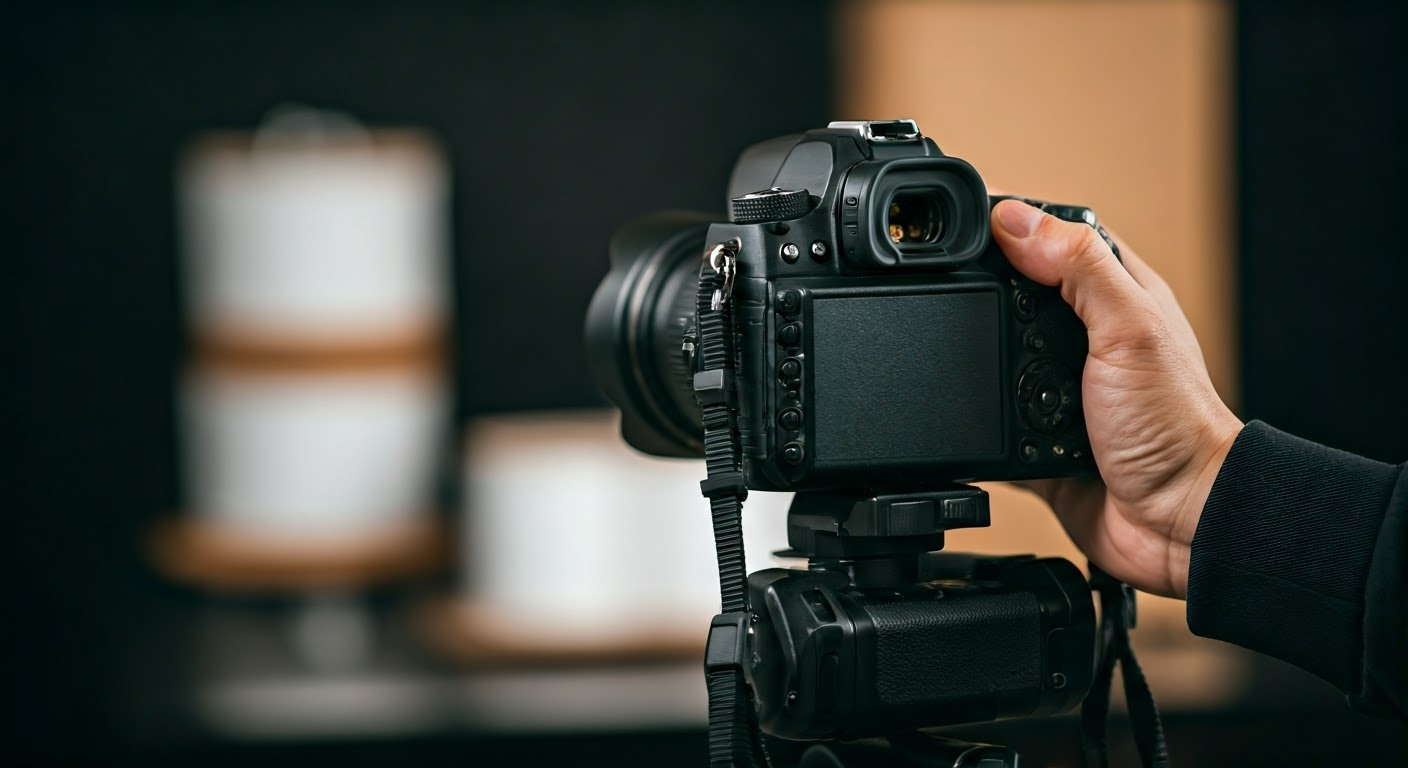
3. Camera Setup
A high-resolution camera is a non-negotiable component of efficiency for this type of product photography. Your camera needs to capture the finest details of the product with precision.
A DSLR camera or a mirrorless camera with a high megapixel count is recommended for large product photography. These cameras offer superior image quality and give you control over various elements such as aperture, shutter speed, ISO, white balance, and focus points.
Choose a camera that allows tethering, i.e., directly transferring pictures to a computer. This lets you quickly preview the images on a larger screen and adjust accordingly for subsequent shots.
4. Props
Props can be a game-changer in large product photography. They bring context to the product, help demonstrate its use, and add visual interest to the image. The choice of your props must align with your overall brand aesthetics and complement the product without stealing its thunder.
Opt for props that help emphasize the product’s features, but remember, ‘less is more.’ Overstuffing your frame with needless props can detract from the primary focus – the product.
5. Accessories
Various aspects of your shoot can be simplified and enhanced using the right accessories. Some must-haves include sturdy tripods for stability, lenses for modification of focal length, remote shutter release to minimize camera shake, reflectors and diffusers for control over lighting, and gray cards for accurate color representation.
Investing in these accessories can significantly streamline your creative process, resulting in high-quality large product images.
6. Post-Production Tools
Post-production holds substantial weight in large product photography. It’s where you tweak and enhance your raw images to achieve the perfect final result. Here are a few essential post-production tools you would need:
- Adobe Photoshop: From enhancing colors to cleaning up unwanted elements, Photoshop has wide-ranging features for meticulous editing.
- Lightroom: Specifically designed for the efficient handling of large image files, Lightroom is excellent at managing and applying corrections across multiple photos.
- Image Optimizing Tools: Online tools help reduce file size without compromising the quality, which is crucial for faster loading on your ecommerce website.
- Retouching Tools: These tools can assist in removing product imperfections and achieving a flawless image.
Also, read our blog on Jewelry Photography with Model: Expert Tips and Tricks
Want to Capture High-Quality Large Product Images? Follow These Tips!
Capturing high-quality large product images is an art that requires a proper understanding of your camera settings, depth of field, shutter speed and more. Every professional photographer should have some tried-and-true techniques to make their images stand out. Let’s explore some tips to help you master the art of photographing large products impeccably.
1. Find the Right Camera Settings
Getting your camera settings right is the key to capturing striking, large product photos. Here are a few points to consider:
- Choose the Correct ISO: In studio settings, with controlled lighting conditions, you can usually afford to keep the ISO low (between 100 to 400). Low ISO ensures minimal noise and a cleaner image.
- Appropriate F-Stop: Setting an ideal F-stop (aperture) is crucial in manipulating your depth of field. An F-stop of f/10 or above ensures a wider depth of field, bringing more details into focus.
- Suitable Shutter Speed: Use a slow shutter speed to capture maximum light. However, be mindful of your camera’s sync speed to avoid syncing issues with the flash.
Remember, these settings are just starting points. Depending on your product and your desired effect, tweak them to get professional results.
2. Focus on Depth of Field
The depth of field determines how much of your image is in sharp focus. A shallow depth of field (lower f-stop value) highlights a specific part of your product while blurring the rest. On the contrary, a wide depth of field(appropriate f-stop number) brings the entire product into clear focus.
Generally, for shooting large products, a wider depth of field works well since it keeps a larger part of the product in sharp focus. This allows the customer to see the complete product clearly. Select your f-stop (aperture) carefully to influence the depth of field and emphasize the areas you want your viewers to focus on.
3. Adjust Shutter Speed
Shutter speed is a critical parameter in controlling how light or dark your image turns out. It’s the time during which your camera’s shutter remains open, allowing light to reach the sensor.
In large product photography, where precision is key, having control over your shutter speed helps capture the product with greater clarity. A faster shutter speed limits the light, reducing potential overexposure in brightly lit setups.
However, pairing it with a strobe or flash might require you to stay within your camera’s flash sync speed limitations to prevent syncing issues. Hence, adjust your shutter speed judiciously to achieve balanced and well-lit images.
4. Lower ISO for Clean Images
When shooting large products, it’s often better to stick with a lower ISO value. ISO is responsible for regulating your camera’s sensor sensitivity to light.
A low ISO between 100-400 is often adequate in well-lit studio environments. Setting a low ISO allows you to reduce noise in the image, preventing overexposed or washed-out results and ensuring cleaner, high-quality product photos.
5. Use Proper Lighting
Always aim for even, diffuse lighting that eliminates harsh shadows and highlights the product’s best features. Overhead lighting is generally preferred in large product photography as it mimics natural light and offers a gradient effect. The quality of light from soft overhead lighting creates stunning natural gradients that amplify image quality.
Use large artificial light sources to ensure even illumination across large products, minimizing unwanted contrast or deep shadows. Adjust the lighting intensity based on the mood and tone you want to convey through your image.
6. Capture Different Angles
Highlighting your product’s various angles gives customers a comprehensive view and a better understanding of the product. Try capturing the product from a front view, side view, top view, and back view to give customers an all-round view.
Capture some close-up shots showcasing detailing or any special features of the product. This not only adds depth to your product shots but also increases customer confidence in your product, motivating purchase decisions.
7. Use Proper Composition Techniques
Composition is all about arranging visual elements effectively to create a pleasing image. Follow classic composition principles like the rule of thirds or golden ratio for a balanced image. Don’t forget about negative space – this isn’t wasted space but part of your image’s composition. Use it effectively to draw focus to your product and avoid a cluttered look.
Also, keep your background free from distractions; remember your product is the hero of the frame. Always aim to align your composition techniques with your brand aesthetics to create harmonious and impactful large product images.
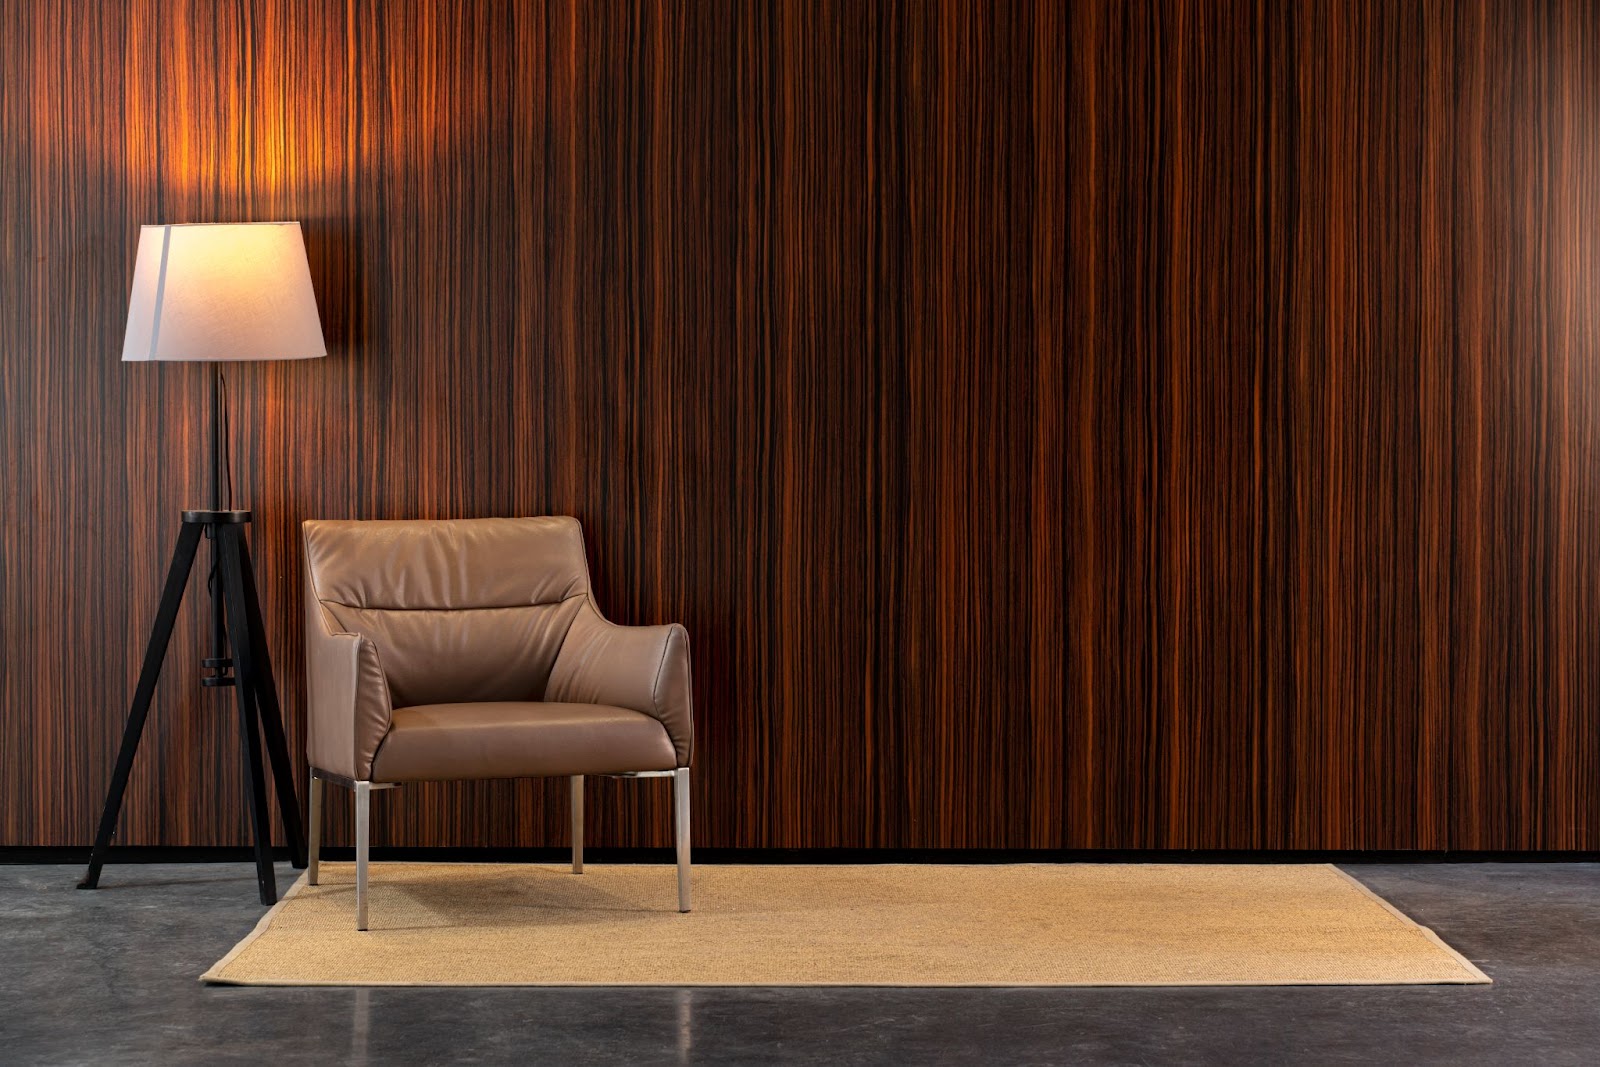
8. Consider Environmental Context
The environmental context can dramatically enhance the appeal of your large product photos. It’s not just about presenting the product but also conveying its usability, scale, and how it fits within a real-world context. Shooting your product in an environment that complements its purpose can make the viewing experience more relatable and appealing to customers.
For example, showcasing a furniture item stationed in a well-designed room setup can give customers a realistic idea of its dimensions, style, and potential fit in their space.
Read: How to Achieve Stunning Product Photography with Models
7 Editing Tips for Large Product Photos
Now that you’ve shot perfect images following the tips shared above, it’s time to polish them further in the post-production phase. Efficient editing can enhance the look of your large product photos, highlight their best features, and ensure overall consistency. Here are some tried-and-tested tips that will help you with consistent color and exposure correction, flawless retouching and blemish removal, sharpening for detail enhancement, excellent color correction, and web optimization.
1. Consistent Color and Exposure Correction
Consistency adds aesthetic appeal, makes your website look more professional, and improves customer experience. Correctly exposed images have a balanced scale of highlights, mid-tones, and shadows, presenting the image in the best light to the viewer.
Editing software like Adobe Lightroom or Photoshop can be used to make these corrections. To verify exposure, place a block of pure white on top of your image and try matching the exposure level to the color block. With the color correction feature, make color adjustments to ensure all your photos have the same white balance, saturation, and vibrancy.
2. Retouching and Blemish Removal
Every product photo might require some cleaning up in post-production. This could be anything from removing dust particles, erasing unwanted reflections, or even eliminating minor product imperfections.
Software like Adobe Photoshop has various tools for this, such as the Spot Healing Brush, which effectively removes blemishes and imperfections for a flawless final image. Always retouch without completely altering the product to maintain authenticity.
3. Sharpening for Detail
To make the intricate details of your large product pop, use the sharpening tool in your editing software. This feature improves the contrast on the edge lines within your image, bringing those fine details to life.
However, excessive use of this tool can result in a grainy image. So, adjust the sharpness level mindfully to achieve clear and precise details in your product image.
4. Color Correction and Enhancement
Color correction is an important aspect of product image editing, especially when you’re shooting a range of similar products in different colors. Be sure to adjust saturation and vibrancy, ensuring colors appear accurate and consistent across images. Be mindful of the product’s color in real life, and aim to reflect that as precisely as possible in your image.
Color enhancement, on the other hand, can be used to highlight or mute specific colors in your shot, adding depth and visual interest to your large product photos.
5. Optimizing File Sizes for Web Use
When using your large product photos on your ecommerce site, file size matters. Larger files take longer to load, impacting your site’s speed drastically. However, compressing your images for web use must not compromise their quality. Online tools can reduce the file size considerably without compromising the image quality.
Additionally, editing software like Adobe Photoshop has ‘save for web’ options where you can adjust the quality-to-size ratio. The image optimization enables faster webpage loading times, improving user experience.
6. Background Editing
In an ecommerce setting, most large product photos require a clean, usually white background. However, despite employing a solid-colored backdrop during the shoot, there might be slight imperfections in the final image backgrounds.
With photo editing software, you can separate the product from the background, make it transparent or flatten it with a solid color layer. This ensures a clean, distraction-free background, focusing attention solely on the product.
7. Consistency in Editing
While editing plays a significant role in refining your large product photos, consistency is key. Whether adjusting highlights and shadows or reducing contrast, aim for a consistent look and feel across all photos.
Many editing software like Adobe Photoshop or Lightroom offers batch processing features, allowing you to apply the same edits to a group of photos at once. Consistently edited images provide a coherent visual experience that adds to the overall aesthetic appeal, making your ecommerce site look more professional.
Read: Essential Tips for Fashion Clothes Photography
What Are the Biggest Challenges in Large Product Photography, and How Can You Solve Them?
Like any other form of photography, large product photography comes with its own set of challenges. From managing shadows and reflections and maintaining image consistency across different products to working with limited space and budget, there’s a lot to consider. Let’s look at these common challenges and ways to overcome them.
Managing Shadows and Reflections
In large-scale product photography, managing shadows and reflections is vital in achieving balanced lighting within the image. Harsh or misleading shadows can misrepresent the product’s details and dimensions, whereas unwanted reflections can be distracting.
Maneuver the size and position of your light sources to control shadows’ direction and intensity. Using diffusers or reflectors effectively helps minimize hard shadows. Using a polarizing filter can be beneficial for managing reflections.
Maintaining Image Consistency Across Multiple Products
When you’re dealing with multiple products, maintaining image consistency can be a challenge. Consistency refers to the uniformity in lighting, angles, product placement, background, color correction, and overall image quality. Inconsistent images can appear unprofessional and adversely affect your brand perception.
To ensure consistency, standardize your camera settings, lighting setups, and post-production steps. Batch processing tools in photo editing software help apply the same corrections to multiple images, ensuring a uniform look.
Working with Limited Space and Budget
While large product photography requires ample space, often, you might have to make do with restricted studio spaces. However, this needn’t deter you from achieving great results.
Position your lighting equipment strategically to prevent unwanted shadows or glares. Use backdrops that can easily be rolled up and stored. For budget constraints, investing smartly can go a long way. Start with the essentials: a good camera, versatile lenses, and a few softboxes. As your business grows, you can gradually upgrade and add more advanced equipment to your product photography setup.
Read our blog on 25 Fashion Photography Poses to Try
Experience the Magic of Professional Photography with Flix Studio!
At Flix Studio, we pride ourselves on delivering unmatched quality and precision in product photography. With a remarkable 99% true color representation, we ensure your product’s hues are perfectly captured, reducing the risk of returns due to color mismatches. Our world-class studio lighting setup, combined with the use of grey cards and pure daylight environments, guarantees accurate color matching with your physical samples.
Every image undergoes a rigorous 60-point quality check, ensuring unparalleled image perfection every time. Our process is seamless and collaborative—kickoff calls start every session, allowing you to witness content creation in real time and provide instant feedback through our live chat.
Partner with Flix Studio for flawless images, unmatched accuracy, and a photography experience designed to exceed your expectations.
Conclusion
Mastering large product photography might seem daunting initially, but with the right approaches, tools, and skills, you’re well on your way to capturing stunning images of your large products. It’s all about understanding your product, properly setting up your studio space, capturing images efficiently, editing for a flawless look, and overcoming common challenges. By getting these right, you will elevate your ecommerce game by showcasing your products in all their grandeur.
At the end of the day, remember that quality product images are not just a visual treat but a powerful sales tool, driving conversions and advancing your brand’s success and credibility.
Frequently Asked Questions
How do I photograph large products with limited space?
In a limited space, make efficient use of lighting and backdrops. Design your set-up vertically instead of sprawled out. Use light stands and booms, and place your backdrops vertically. If needed, use wider lenses but avoid distortions.
What is the optimal resolution for large product images on e-commerce websites?
Though it varies across different platforms, a resolution of 72 dpi is standard for web images. For large products, an image dimension in the range of 2048px to 2500px on the long edge ensures your product looks detailed on all devices.
How much does a large professional product photography cost?
Large product photography costs vary widely depending on factors like complexity, required equipment, location, and the photographers’ expertise. On average, professional product photography can range anywhere from $25 to $400 per image.
Can I use my smartphone to take photos of large products?
While smartphones have improved drastically in picture quality, for professional large product photography involving intricate details, superior lighting control, and high-resolution images, a DSLR or mirrorless camera is still recommended. Smartphones can, however, be used for behind-the-scenes photos or social media content.