
Product photography on white background is a popular method for clicking photos of products in the E-Commerce industry. The white background gives the photos a clean look, while the focus is entirely laid on the product, no distractions.
This is why many E-Commerce photographers leverage this style to click stunning visuals of a myriad of products.
In this blog, we have covered everything you need to know about perfect white background product photography including its advantages, how to do it, and how to edit the pictures. Let’s get into it.
Advantages of Using White Backgrounds in Product Photography

White background product photography comes packed with a host of advantages. From creating clean, professional images to providing versatility across multiple platforms and marketing channels, white background color serves multiple purposes. Importantly, they aid significantly in driving sales by creating an indelible impression on customers.
Enhances Product Focus
One of the key strengths of white background product photography lies in its ability to enhance store consistency and product focus. With no distracting elements around, your customers’ attention is drawn solely to the product. The use of a spotless white backdrop accentuates the colors, textures, and unique aspects of your product, offering visually enticing images. Consequently, the first impression your product leaves on potential buyers becomes robust and unforgettable.
Versatility Across Marketing Channels
Among the multitude of benefits, another worth noting is the remarkable versatility it offers. Be it your official website, Amazon, Shopify, Walmart, or social media platforms; white background product photos integrate seamlessly with any marketing channel. These images maintain a consistent and professional aesthetic, ensuring that your products look their best regardless of where they are displayed.
Simplifies Editing Process
Lastly, the white background simplifies the editing process significantly when displaying your product on different digital platforms. An image shot against a white backdrop readily allows background removal and replacement without compromising the product’s details. This ease in manipulation saves considerable time and effort in the post-production phase, making white background product photography an efficient solution for marketers and photographers.
What are Some Essential Equipment for Pure White Background Product Photography
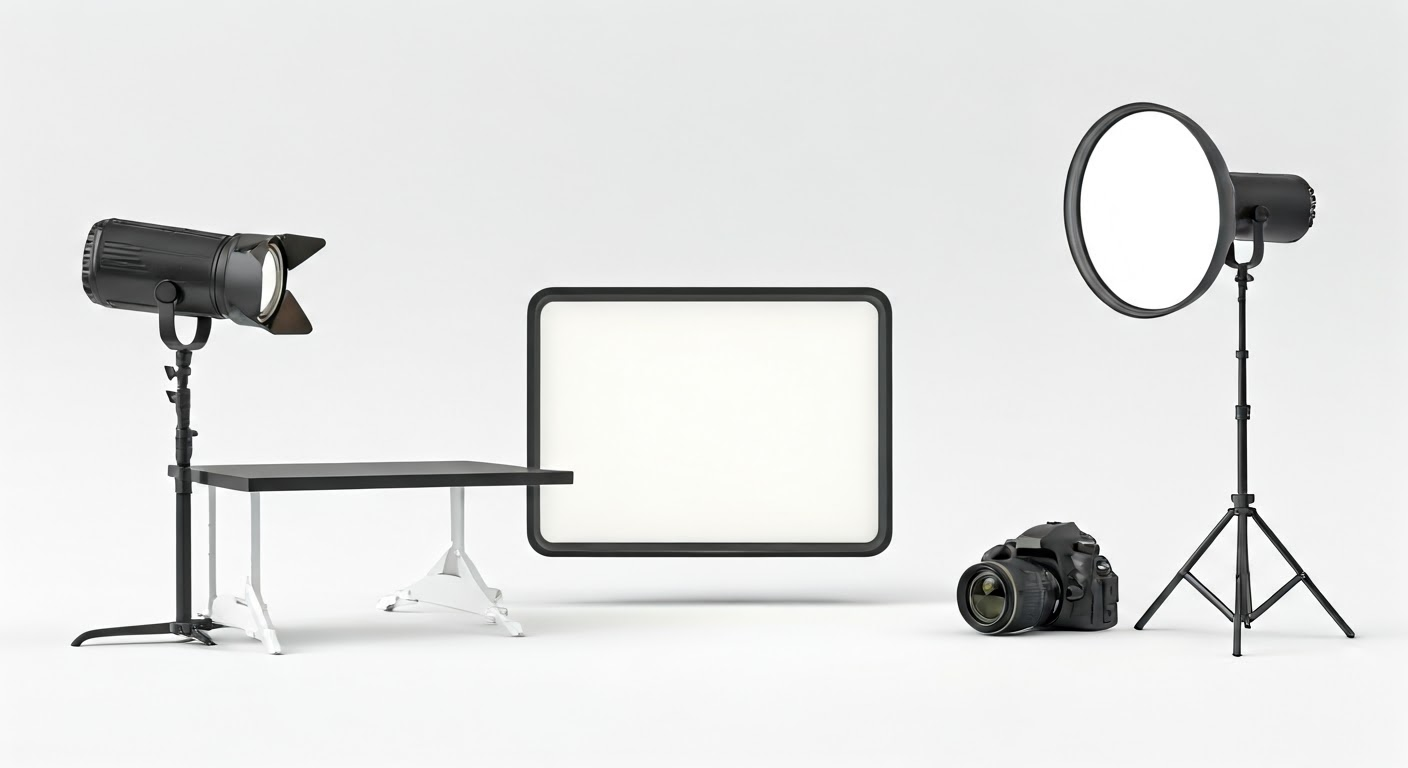
Achieving a pure, white background in product photography requires the right tools and equipment, as well as an understanding of depth of field. Your toolkit should include various types of white backgrounds, a light box or tent, a shooting table, advanced lighting solutions, the appropriate camera settings, and effective photo editing software.
White Background Options
There are some standard white background options typically used in pro-sumer and professional photography setups:
- White Paper Rolls: These are an economical option for a plain white background that can cover both the base and backdrop.
- Fabric Backdrops: Using a white fabric provides flexibility but might require regular ironing to smoothen out creases.
- Painted White Wall: If you have a permanent setup, painting a wall white is a viable choice.
- White Shooting Table: These are specialized tables with a curved and seamless white surface that provide a clean, shadow-less white background.
Remember that the selection ultimately depends on your specific requirements such as the product size and feasible lighting setup.
Light Box or Light Tent
For smaller products, a light box or tent is a handy piece of equipment. Made of translucent material, it allows for even, diffused lighting from multiple angles, reducing harsh shadows. When paired with a white backdrop inside the box, the result is a well-lit product against a spotless white background. The light box’s compact size also makes it ideal for confined shooting spaces or for people who need a portable solution.
Shooting Table
A shooting table is another vital piece of equipment for white background product photography. It’s particularly beneficial for photographing large products. With a dedicated white shooting table, you can achieve a seamless white background without the hassle of setting up a backdrop each time. The curved surface ensures shadow-less lighting and a smooth transition from the base to the backdrop.
Lighting Solutions
The lighting setup plays a crucial role in creating a pure white background light. The goal is to ensure an even spread of light across the product and backdrop without causing any flare or harsh shadows. Depending on access to natural light or the setup, you might require additional lighting solutions such as studio lights, natural light, or softboxes.
Tripod and Camera Settings
Stability is key to quality photography. Using a sturdy tripod ensures that there is no camera motion during the shot. This is particularly important when using slower shutter speeds and the fastest shutter speeds for crisp images. Additionally, your camera settings play a major role. Set your camera to manual mode for complete control over exposure.
The white balance should be adjusted to counter any color casts and ensure a pure white background. Also, play around with different levels of exposure to find the perfect brightness while adding depth to the product details.
Photo Editing Software
Lastly, photo editing software is crucial to finalize your white background product photos. Post-processing allows for adjustments such as optimizing brightness, removing any remaining shadows, or refining edges, especially for products with reflective surfaces. Some popular choices include:
- Adobe Photoshop: Renowned for its vast features and tools, it’s the go-to software for professional editing.
- Adobe Lightroom: This tool is optimal for batch editing and basic adjustments like exposure, contrast, and color correction.
- GIMP: If you’re looking for a free alternative, GIMP is a versatile tool for photo manipulation.
- Capture One: Preferred by many professionals, it offers advanced editing features along with excellent tethering capabilities.
Also read: How to Achieve Stunning Product Photography with Models
How to Set Up the Perfect White Background Product Shoot
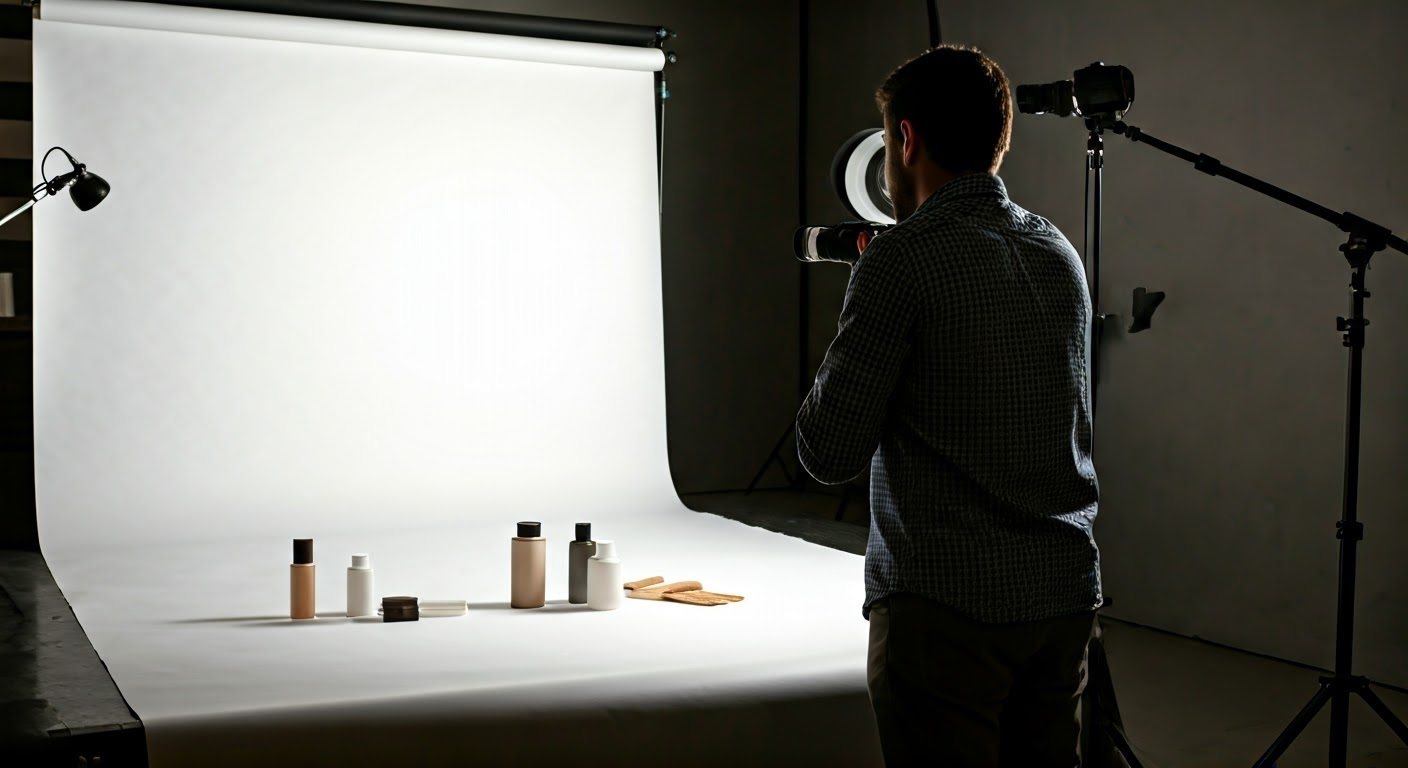
Setting up your shoot involves several critical steps taken from choosing the right lighting to creating a test shot list. These steps will guide you to perfectly position your product against the white background, set your camera and tripod strategically, and capture your product in multiple perspectives. Mastering these steps will allow you to create a flawless and aesthetically pleasing product photo that appeals to your customers.
Choosing the Right Lighting
Lighting plays an essential role in achieving a clean, white background. You should aim for diffused, even lighting that minimizes harsh shadows while illuminating the entire scene. For this, you may use a combination of natural light, studio lights, or softboxes, as well as additional lights depending on your requirements. The key is to ensure that the light source fully covers your backdrop and product without causing any overexposure or flare.
Natural Light vs Studio Lights
In the debate between natural light and studio lights, it’s crucial for professional photographers to consider their unique attributes. Natural light provides a soft, diffused illumination which is perfect for creating a white aesthetic. However, it’s not always consistent and might need additional reflectors or diffusers for control. On the other hand, studio lights provide reliable and adjustable lighting. The intensity, direction, and color temperature of studio lights can be fine-tuned according to your needs, offering more control over the final outcome.
Setting Up the Background and Product
Once your lighting is sorted, the next step involves setting up your white background and appropriately positioning your product. Opt for a seamless, wrinkle-free white surface such as pure white paper rolls or a shooting table to create an uninterrupted visual flow. Remember to place your product strategically so as it stands out against the white background. Using props or product stands can help showcase different angles or perspectives of your product.
Positioning the Camera and Tripod
Position your camera and tripod based on the size of your product and the type of shot you plan to capture. Aim for a composition that focuses the viewer’s attention on the product. Ensure the camera is stable to avoid any movement during the shot. Adjust your camera settings accordingly to capture the perfect exposure, keeping in mind the white balance to prevent any color casts.
Creating a Shot List and Capturing Multiple Angles
Creating a comprehensive shot list of the different angles and perspectives you want to cover can significantly simplify your shoot process. Aim to capture several shots of your product from various angles to offer viewers a complete visualization. Showcasing unique details and the key features or any additional accessories that accompany the product can assist potential customers in making informed purchase decisions.
How to Edit White Background Product Photos Like a Pro
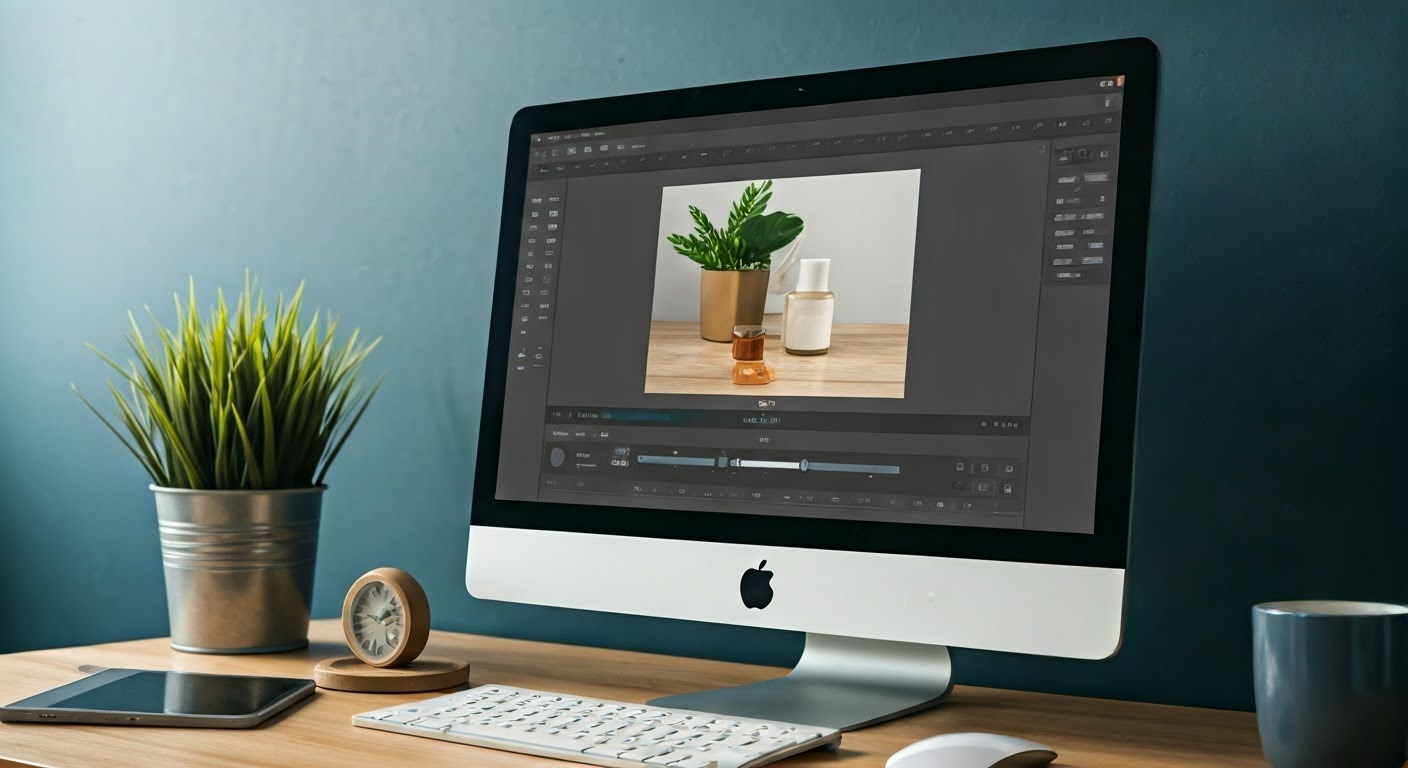
After capturing your product images, the next integral step is to edit your photos like a professional. This includes crucial techniques such as removing background edges, adjusting brightness and contrast, retouching any spots or imperfections, making color adjustments and optimizing your photos for SEO purposes. It is in this stage that the picture truly comes to life, fine-tuning the minor details that weren’t right in the initial stages.
Removing Background Edges
Despite using the best lighting and backdrop, some minor imperfections, such as uneven lighting, can appear at the edges during the shoot. Photo editing software allows you to remove these unwanted edges with ease. Tools such as the lasso, pen, or magic wand in programs like Adobe Photoshop or GIMP can be utilized for precise edge control. This step not only cleans up the image but also further enhances the white background effect.
Adjusting Brightness and Contrast
For a vibrant white background product photo, you should aim for an optimal balance of brightness and contrast. Adjusting these settings can make your image pop and add depth to the product. Remember not to overdo the brightness as it may wash out essential product details. Similarly, excessive contrast could introduce unwanted shadows or distort colors. The goal is to maintain an ideal exposure that highlights the product while keeping the background perfectly white.
Retouching Spots and Imperfections
Retouching is another critical step to refine your product images. Although you strive to capture a perfect shot, minor spots or imperfections can be unavoidable at times. Using tools like the healing brush or clone stamp in photo editing software, you can easily touch-up these areas. Retouching not only improves the quality of the image but also accentuates the product features, making your photos stand out against the white background.
Making Color Adjustments
Color adjustments allow you to enhance the overall look and feel of your photo. You can adjust the saturation, vibrancy, or hue to make the colors pop or mute them down as required. This gives you control over how your product contrasts against the white background. Remember to always keep the colors true to the actual product as it helps your customers make accurate buying decisions.
Optimizing Photos for SEO
Finally, don’t forget to optimize your product photos for SEO. This boosts your visibility on search engines and enhances your online presence. Include relevant keywords in your image file names, alt text, and metadata. Ensure your photo files are correctly sized – smaller files load faster, improving user experience and search ranking. These little tweaks go a long way in improving your organic reach and driving more traffic to your product pages.
Also read: The Art of Ecommerce Fashion Photography
Conclusion
In the world of e-commerce, high-quality product photos are essential. They can either make or break a customer’s buying decision. White background product photography is a powerful tool that improves product focus, provides clean and crisp images and drives sales. Although creating a pristine white background might seem challenging, with the right approach and equipment, it’s entirely feasible. Always remember, the end goal is to showcase your product in its best light, and a white background just does that brilliantly!
Frequently Asked Questions
How can I make my product stand out against a white background?
To make your product stand out against a white background, ensure excellent lighting and proper contrast. Showcase your products from various angles and highlight unique features. Applying post-production edits like brightness and contrast adjustments can also enhance the product’s visual appeal.
What are some common mistakes to avoid in white background product photography?
Common mistakes include overexposure leading to loss of product detail, inconsistent color balance resulting in non-matching whites, and using a wrinkled or stained backdrop. Also, failing to capture the product from different angles or not using post-editing software properly can lead to less-than-perfect images.
Which photo editing software is best for editing white background photos?
Adobe Photoshop and Lightroom are commonly used for editing white background photos due to their comprehensive tools and intuitive interfaces. For a free option, GIMP is a good alternative. Capture One is often preferred by professionals for its advanced editing features.
Can I use my smartphone for white background product photography?
Absolutely! Modern smartphones and digital cameras come equipped with high-quality features that can capture impressive photos. Remember to use good lighting, a sturdy tripod or mount for stability, and photo editing apps to tweak your pictures for the best results. However, for larger-scale or commercial shoots, a DSLR may be more appropriate.